Thank you everyone for all the sweet comments you left on my Pottery Barn inspired lazy susan project. I was just blown away by your kindness.
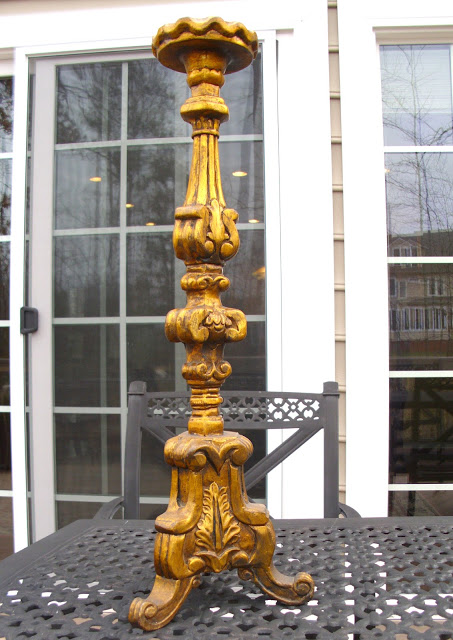
This is another project I did the same day as the lazy susan. I had this pair of altar candlesticks in my shop for six months and they never sold. When I bought them I really did not like the gold finish but I left them alone thinking someone else might like it. Here is one of the candlesticks in all its golden glory.
I wanted a chippy plaster look so I pulled out the wall spackle paste. You may remember the lamp I used a similar technique on. This is such an easy project but it makes quite a transformation.
First add spackle to the candlesticks covering as much as you want of the old finish. I found it was easiest to apply this with slightly damp fingers. You don’t have to be careful here. Some areas I did a light coat and others I just globbed it on. When dry take sandpaper and lightly sand the areas that look too rough.
The next step is to add glaze. I used Ralph Lauren Smoke because I always have this around. Lightly apply the glaze and wipe off until you get the look you want. Finish the candlesticks with a coat of spray varnish or polyacrylic.
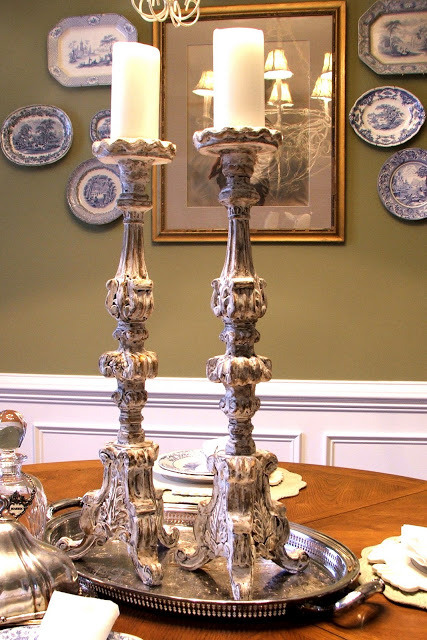
Here are the new improved candlesticks.
In person they do look like chippy plaster.
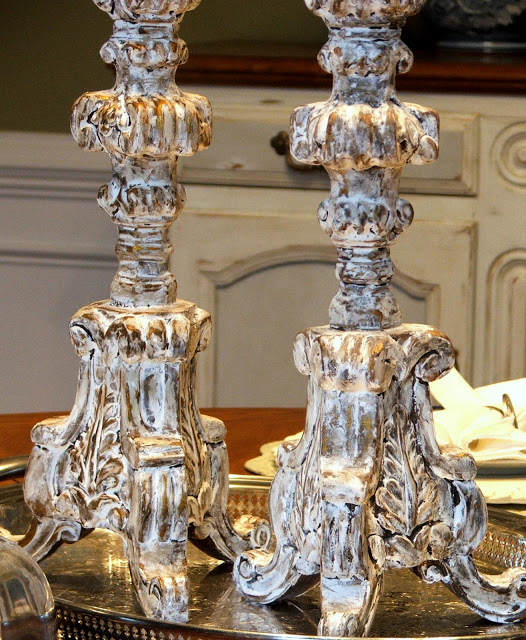
Here’s a close-up.
You can see I left a little of the gold peeking through. I have them sitting on my $6.00 thrift store silver tray.
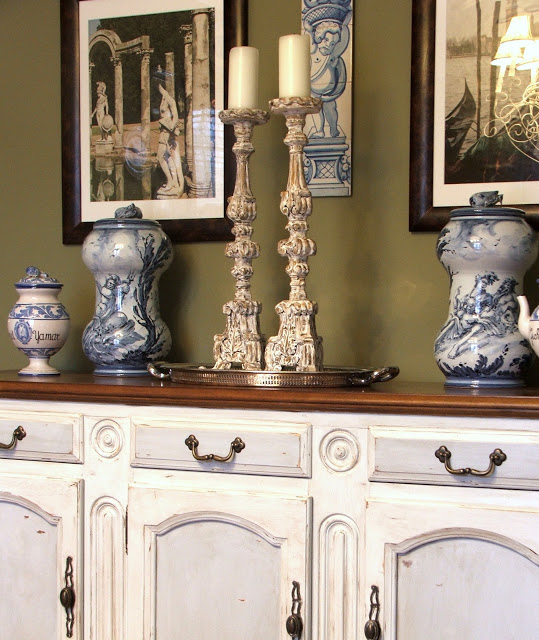
Decided I like them better on the buffet. Now I am debating whether to take them back to the shop or not.
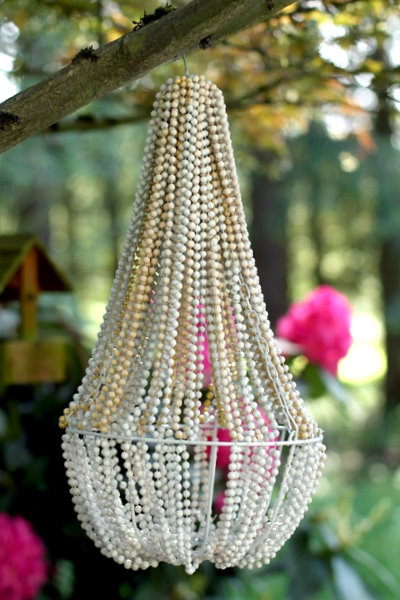
I also want to show you a great project I found while browsing through other blogs. Heather at Dollar Store Crafts made the most adorable chandelier from Christmas beads bought at the dollar store. You have to check this out and see some of her other thrifty projects.
Thanks Heather for letting me share this!




Love the candle stick make over. Keep up the great work.
I am amazed at how different these candlesticks look! The plaster is a great technique. They look beautiful!!!
those are awesome! i tell ya, i dont think i would ever come up with any ideas like i find through my blog list.. there are some pretty amazing and creative women out there. and youre one of them!
thanks for sharing.
A-maz-ing Sherry!!! These turned out gorgeous! The change is definitely dramatic. I love them. LOVE THEM!!!
hugs
Oh goodness, Sherry! These would sell for a fortune in Horchow or Frontgate! They are just exquisite in all their chippy glory. I'm going to use this technique.
Wonderful tutorial!
Yvonne
Hi Sherry~ I love how these turned out! The finish is gorgeous- I say keep them- they look amazing on the tray! 🙂
Miraculous transformation. I am so glad they didn't sell. It seemed so easy for such a great outcome. Don't you love it when that happens.
Great thing about having a shop, you use it til you tire of it, then sell it and bring something else home. Girl, you got the best of both worlds.
Oh, when you do put them back in the shop, raise the price. Hugs, Ginger
Those look stunning. I have to go back and see your lazy susan. I have some candle holders I purchased at Hobby Lobby similiar in different sizes but they're a bit chip. I think I'll try a similiar technique
Oh I love them! What a difference you have made. I would keep them. They are gorgeous.
The candlesticks are beautiful. When I first saw them I thought they were pretty and that they didn't need anything done to them– I like the gold finish — but you really made them even better!
They look amazing! I think I might just have to keep them if they were mine. They look great on your buffet on the silver tray.
Those "new and improved" candlesticks are crazy wonderful! Love the new look! Only take them back to your shop if you're sure you want to part with them–they will surely sell now.
Best,
Susan
They turned out great, Sherry! I love them on your buffet.
Those candlesticks are amazing looking. They really came out fantastic!!
Great transformation Sherry, I can't believe the difference a little spackle and glaze made, they look positively grand.
I have two small candlesticks in the basement that I've been contemplating sending to GW because I just didn't like them. This may be their saving grace.
Your candlesticks look fabulous. I love them. They look so great with the new finish. I think you should keep them. Wonderful on the buffet. Hugs, Marty
Love them Sherry, do always do an awesome job on all you do my friend..Hope you have a GREAT Sunday girl..I'm sick with a cold sneeze, cough ha ha!! Hugs and smiles Gloria
Ouuu!!! I've never seen this technique before but I love it! I am going to have to find something to try it on now! Thanks! Be prepared for them to sell if you put them back in the store.
Very Clever technique. I am going to bookmark this so I can remember it. I am not a gold person either but love the finished results!
I just love this idea. I am saving this post for a future project!! They turned out just gorgeous!
Wow what a difference! I would keep them they are beautiful on the silver tray……but if you take them to the shop I bet they sell fast!
I bought a couple of bronzy altar candlesticks at tj maxx and haven't been able to decide how to redo them.Thanks for the inspiration. Now I know what to do! Love them!
Stunning transformation!
Sherry,
I so would keep these beauties…can't believe how easy this is…I might need to give this a try…thanks for sharing:)
Blessings,
Linda
OH god amazig,keep them thay look beautiful on the tray!
XO
Isora
These candlesticks are awesome! I love the old world look that the plaster created. I would keep them too! They look beautiful on your buffet.
Miracle of miracles!!! I was actually wondering how this sort of thing would work this morning, thinking I was on to something, but I am soooo happy to see you went there already…I probably wouldn't have taken the risk…so seeing your terrific results, I am overjoyed to rethink what I was thinking. I really hope this all made sense, maybe I should have just said "Great job! Love the idea!" hahahaha!
Those turned out great. Although, I would've snatched them up as is in all their chunky gold glory if I was able to go in your shop! ;). I also wanted to give you a big ol' WOOT-WOOT! on your $1 version of the PB lazy Susan. I actually like yours much better. I linked back to your antique sign and I remembered that's why I started following you in the first place, I love that sign!
Have a blessed weekend!
Missy
Those look great! So much better than the gold =)
Sherry, you come up with such great ideas. I love the idea of adding texture to those candlesticks. They look awesome. What a buy on the silver tray!
That is amazing and I am smittten. I have two lamps that this might work with. Thanks bunches♥♥♥
HELLO SHERRY~THESE TURNED OUT JUST GORGEOUS! LOVE THE OLD WORLD CHARM YOU GAVE THEM 🙂
XO~MARI
Just found you! So thrilled I did! LOVE your blog!!!!
Hugs,
Maryjane
Hi Sherry! Oh, your candlesticks looks wonderful! Who would have thought? You're so creative and these really look beautiful.
Be a sweetie,
Shelia 😉
Bonjour SHerry,
These candlesticks turned our beautifully – enjoyed the tutorial.
Hmmm, I may have to try this myself…
Bon weekend,
Mimi
What a gorgeous vignette Sherry! And what a nice touch the Spackle gave.
-Rene
What a beautiful transformation! I love that chippy plaster look and you really nailed it. Now, I am off to look around my house for something to spackle! Oh by the way – you gotta keep them!
what an amazing difference! they are gorgeous now!!!
suzanne
They turned out great Sherry. What a difference. I bet they would sell really fast now. Though I'd be tempted to keep them too if I were you!
Those are wonderful!! I have a fleur de leis this would be great on!
Keep 'em girl! I love them! I plastered a whole wall. LOL…You will see it when you come to visit. xoxo
The candlesticks look amazing. Thank you for the DIY. I can't wait to try this technique on something.
Stunning!!!
Love the makeover of the candlesticks. You've got me trying to figure out something I could try this out on.
They are just awesome! I love them!
PS I'm a new follower! I really enjoy your blog!
Sherry they look amazing!!
Can I ask what kind of spackle you used? I have a very similar Goodwill candlestick lamp. Soon to be candlestick only. The same too bright gold finish. I'd love to try this.
And that dollar store beaded chandy really is quite amazing! So glad to hear from you. Glad you liked my haunted room *winks* Now I'm following you too. Vanna
I loved the PB inspired project and this one is just as fabulous! I just LOVE them…I will be keeping my eye out for tall candlesticks now!
Chelsea
My goodness you really did something with those candlesticks!! They were nice before but now they are spectacular! I absolutely love it!
-April
Those are gorgeous Sherry and I know right where they belong…in my house!!! 🙂
Vanessa
Your new candlestick are very happy with their makeover. Those are really sharp looking!
Thanks so much for joining TTT. Your candlesticks are just fantastic. I love them. Hugs, Marty
You're a sweetheart! I wish I could meet you.. you know? It's not easy to find people like you and on top of all, you're sooooo talented! Good job!
Oh I wanted to tell you… today I posted my dream home! It's the most well designed house I've ever seen.
Have a blessed week, Sherry!
xo
Luciane at HomeBunch.com
Love the candlestick makeover…they look like something you would find in an expensive gift boutique!!
Wow!! What a great technique! Can't wait to find something to try it out on.
Cheers,
Andrea
What a great look you achieved!!!
m^..^
Wow! So amazing!! I have a headboard for my guest room I am working on that I am wondering how the spackle treatment would look on it? I might have to give it a try! Thanks for sharing!
Your candlesticks look so professional – nice job! Thanks for your sweet comment on DD2's picture wall.
Allison
Atticmag
oh yea, much better the chippy plaster way!! love 'em!
Hi Sherry! I love how your candle sticks turned out. Very fancy and expensive looking but they look like antiques. Amazing job!
You MUST keep them! They are beautiful! They look amazing on your sideboard!
Love love love!
Wow, who knew a little spacle could make such a transformation. They are just perfect now.
Spackle~ who knew? These look wonderful, Sherry. They have such an expensive, old world look. I think you'd sell them now! Unless, of course, you refuse to move them from your own tabletop! LOL Wanted to say I loved the Lazy Susan transformation, too. Glad you're feeling better. 🙂
~ Sue
Hi Sherry, Wow I love the candlesticks. You are so clever. I'd like to try that on same things I have around here, I'm not real crafty! lol Thanks for your comments, maybe lunch next week?
Hi Sherry…
Girlfriend, you are sooo creative and talented! I remember the lamp that you did the old plaster technique on…it turned out fabulous! But I would have never thought to do that same technique on the candlesticks. Ohhh my gosh, they turned out gorgeous…I love this look!!! I also love the old world chippiness of your candlesticks with the silver tray…gorgeous, my friend! I think they look beautiful on your buffet…I would have to keep them! Hehe! I am definitely going to keep this plaster technique in mind…I would love to try it! Thanks so much for sharing your creativity and talents with us, sweet friend! You always inspire me!
Warmest winter wishes,
Chari @Happy To Design
PS…almost forgot, I also really enjoyed the string pearl chandelier…sooo pretty!
Sherry, they are positively to DIE for! Gorgeous – drop dead gorgeous! You've got a great eye!
Michelle
http://www.newengland-style.com
Well NOW I see what all the hub bub was about. These newly revised candlesticks are fabulous! How on earth could you ever sell them now? Seems for sure they should stay in your home.
Donna
Sherry….those look amazing! What a transformation! I will be spackling everything in sight now. Thanks for the tip!
Beautiful!!!
I love the plaster affect ..Great DIY project !!!
Sara
Adore, adore, adore them and I have never heard of this technique. I have plenty of heavy gold things that got retired. I am going to have to try this, who knew!
Thanks for the fabulous tip.
these are fantastic candlesticks – you truly have an eye for "Pretty"
xoox
Seriously. Gorgeous. It just proves (like you always do) that one man's trash is another man's treasure. That is, if the second man is good with spackle and a paintbrush. Lisa~
Sherry, thanks so much for joining the party. I love the look of those candlesticks. I know you said you used spackle. Was it spackle or joint compound. The spackle I use would probably flake off.
Absolutely gorgeous, these turned out wonderful. I can't imagine that you want to sell them now 🙂 I am definitely going to try that spackling trick.
Thanks for sharing.
You are so creative. I love that look.
Looks grea!I did almost the same exact thing to my big chunky GOLD candlesticks back in the Summer…I love how mine turned out too!
Just wondering if you've ever tried this on furniture??? I've seen some really chippy, layered colors on buffets and dressers and it looks thicker than even chalk paint can achieve. Might be worth a try!
You're a smart cookie….now do some carved wooden lamps using this technique and sell to me! 🙂